- In: Craft for kids | Festivals | Hebrew | Uncategorized
- 4 Comments

I remember making and playing with paper fortune tellers (also known as chatterboxes or cootie catchers) when I was a child. Earlier this year my daughter brought one home from primary school, proof that while much has changed since my childhood, much also remains the same. I was struck by the possibility of combining the eight internal faces of the chatterbox to the eight nights of Chanukah, an idea which I’m sure has many more possibilities than the simple one I have settled on for class this weekend.

I found a template online (google “chatterbox template” and you’ll see many) and filled it in. Depending on the age and ability of your children, and the amount of time you have available, they could fill it all in themselves, but this guarantees a minimum standard of completion and legibility!
 Black and white diagrams can be coloured in, children can practice the first eight letters of the alef-bet instead of counting to eight, and underneath each letter is a question relating to the festival. I left half unanswered so they can do a bit of work themselves before taking their new toy home and quizzing their parents.
Instructions on how to fold a chatterbox can be found online – thank you again google.
You can download a printable pdf of my Chanukah chatterbox here. Or be brave, go make up one yourself!
Chag sameach!
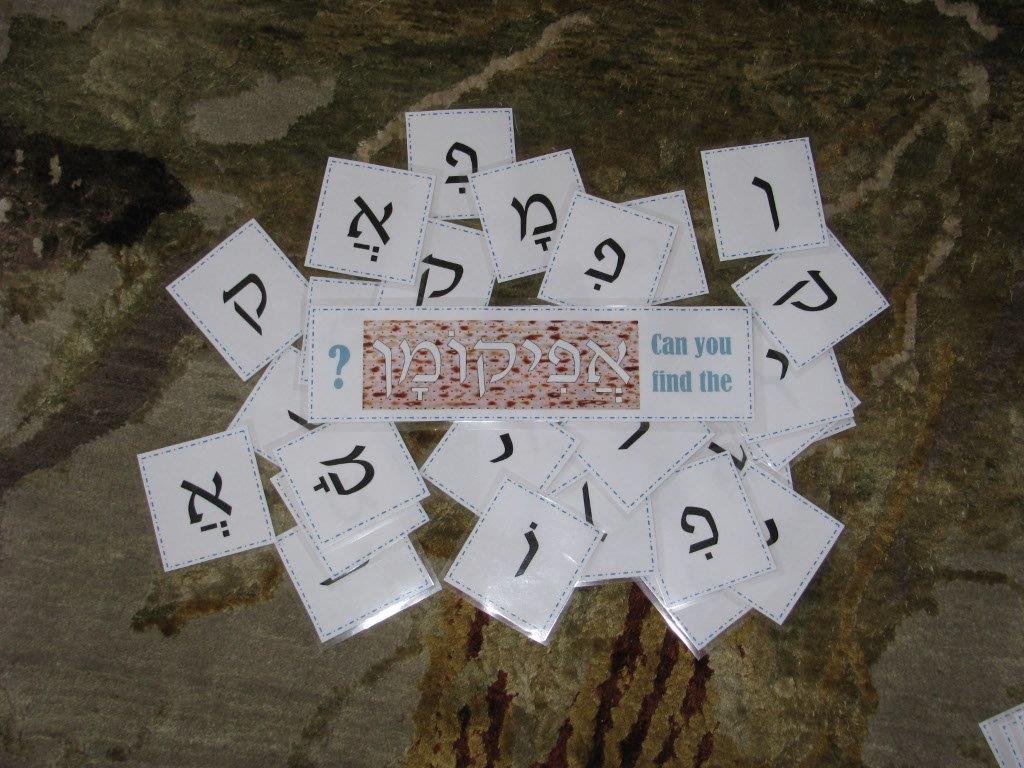
This is a neat game for kids, combining the fun of a treasure hunt with some Hebrew learning!
The afikoman is the piece of matzah which is traditionally hidden during the course of the Passover seder for children to find later, and it becomes the last thing to be eaten at that seder.
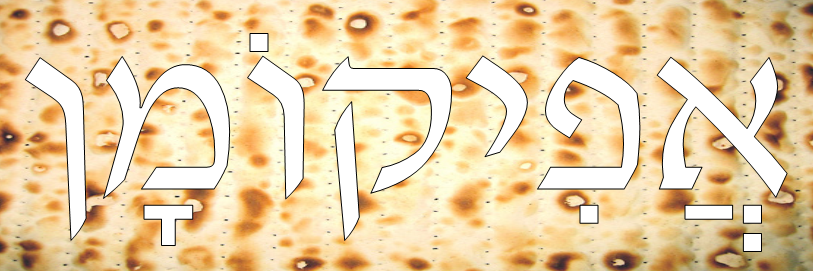
In this game, I printed and laminated copies of each Hebrew letter in the word “afikoman” (which curiously enough is actually derived from a Greek word), and the full word. I made a set for each team taking part and hid the letters around the yard.
The rule was that only one child per team could run off to search at a time, and they could only bring back one letter. If it was a letter that team had already found, it needed to be rehidden. (Eventually the kids realised it was worthwhile checking and remembering which letters had been found before they ran off looking for another one!)
Quick, easy, and with a big enough yard, quite good exercise too.
You can download my copy of the Afikoman hunt cards here. Happy hunting!

Beards are curiously fashionable at the moment, and now you can make your very own!
When looking for Purim photo booth props, I found a quite reasonable beard outline. However it was adult-sized and entirely flat. So I adapted it to make it a little smaller, and then added some layers. I cut the beard out of lightweight card and attached it to a large popstick. Unfortunately, black layers on a black background did not provide a great deal of contrast, so I experimented using layers of different colours.

I decided that it wasn’t so much the colours that mattered as the depth of the layers. I had joined the three beard layers together using double sided tape near the top of the beard. This left plenty of room to insert a piece of craft foam between the layers so that the lower part protruded outwards, making a much more visually interesting (I can hardly say realistic!) beard. The picture above shows the beards with the foam between layers, but you might just have to take my word for it. The moustache overlaps the beard leaving a small mouth space. The overall impression is possibly less biblical hero and more Lorax, but it’s the thought that counts, right?

After I’d made my beard props, I thought it would be a fun activity for the kids too. Here is my beard template with all four pieces on one page. If you pre-cut the four shapes in cardboard, kids can just trace around them. I found it helps for them to see how to lay out the page so as to fit all four pieces and not waste card. The kids were happy to staple their beard pieces together in the absence of double sided tape at the activity day.
Enjoy finding new characters to portray with your new beard!
Purim photo booth
Posted on: 1 March, 2015

Each year on the weekend before Purim, we run an activity session which always involves mask making or decorating. The younger children love anything involving cutting, sticking, sequins, feathers and glitter, but it can be difficult to enthuse the older ones, especially the boys. This year, only a few days before the session, I had the idea of incorporating a photo booth, with a range of Purim-themed props. It was fun to create, and the booth was a hit with kids of all ages.
The first thing I made was my advertising sign. As the Purim story is set in the city of Shushan, I decided the good folk of that town would be sure to enjoy a chance to dress up and smile for the camera. You can download a PDF of the Purim photo booth sign here.
I googled free photo booth props and found some fabulous Victorian-era handlebar moustaches and lips that could outpout Mick Jagger, but nothing which really took my fancy, so I decided to make my own.
In recognition of the key roles of Queen Esther and King Achashverosh in the Purim story – a pair of gem-studded crowns. For these, I selected, resized and printed out a couple of pictures of crowns found via google image; cut them out and attached them to glitter cardstock cut a little larger than each crown; and added a couple of stick on gems. Then I sticky-taped a kebab skewer to one side of the reverse.


Reflecting the historical likelihood of full manly facial hair – some cardboard beards. You can make your own – biblical beard prop instructions are here.

Celebrating a traditional Purim food in a non-traditional way – I may have invented hamanspectaschencles.

And then I just made up a bunch of different signs, thoughts and speech bubbles. It was fun. I had more ideas, but they will have to wait for another occasion.


You can print your own Purim photo booth signs here – just attach to cardboard and add a handle. I mostly used large plain popsticks from a craft store – they are the size of tongue depressors.
I pinned up some plain colourful fabric as a backdrop, ran an easy printable Purim banner across the top, and after the kids had made their own mask (or beard, or hamanspectashencles), I took their photos. It was loads of fun, and I’ll definitely be doing it again next year.

Printable Purim banner
Posted on: 28 February, 2015

After I constructed my paper Purim banner, I scanned the letters so I could print them out again without having to worry about any cutting and sticking. You can find the individual letters saved as .jpg files on the original post.
I saved all the letters at their original size into a PDF file – but the file was huge! I compressed the file, but this reduced the print quality. It is probably OK if you want something large (to be seen across the room) but are not too worried about how it looks up close. Purim banner – A4 size.compressed.
Next I saved them into a PDF file with each letter half as big: Purim banner – A5 size This file has a better resolution and should print fine.
I also ended up, somewhat by accident, with a PDF file which gives two copies of each letter, but with four letters per page. These are the perfect size for a couple of small banners for home or classroom – download it here: Purim banner – mini size
Print, cut out the rectangles, and sticky tape a piece of ribbon across the back. Try and leave slightly more space between the words than I managed on my first effort!
Happy Purim!
- In: Craft for mums | Festivals
- 1 Comment

Purim is fast approaching, and I wanted to put something colourful on the pinboard in the hall we use for Hebrew school. The easiest thing I could think of was a banner – or (time was running short) a bunch of letters arranged like a banner. Or indeed just a bunch of letters pinned to the board. [NB: the picture above is a not so great photo of the finished letters on the floor of my home. They look much better on the pinboard!)


Of course these letters needed to convey the joyful, party mood of Purim, so I decided to make them out of scrapbooking paper in a variety of colours and patterns.


These are simple to make if you have access to a printer. Make a template for the letters in Publisher or Word (or other text based software) by inserting a text box onto a blank page so that it fills almost the entire page. (It’s easier in Publisher, but if using Word, you will probably need to specify narrow margins in the Page Layout tab). Set the font to something which is going to be easy enough to cut out when very large. I used a font called Berlin Sans FB Demi, size 750pt. Into this box, type one letter. Use the formatting tools to set Font fill to “no fill” but keep Font outline as black (or any other colour).


Now you can print out this letter onto coloured paper. I like to buy packs of fancy scrapbooking paper when they are on special. I don’t actually scrapbook, I use the paper for papercuts, card making etc. The paper tends to be square (unlike your printer), but it’s not difficult to fold each piece and cut it to fit your printer tray, or trace around a piece of cardboard the size you need (A4 in my case). It doesn’t matter if the edges of these pieces are not perfect, because you will be cutting out the printed letter in the centre of the page.


Once you have the letters you need, attach each of them to a contrasting backing sheet. The letters I made would have looked fantastic on 12 inch square backing sheets, but I cut mine down to slightly smaller than A4 because I wanted to laminate them, and I only have A4 laminating pouches.


Well that looks great, I hear you say, but I don’t have time to faff around making a template and cutting up bits of coloured paper. No problem! After I made my letters, I scanned them. You can download individual letters from this page, or PDF files from here – (almost) no cutting or sticking involved.
Tactile alef-bet flashcards
Posted on: 5 October, 2014
- In: Craft for mums | Hebrew
- 3 Comments


When I started teaching Hebrew alef-bet, I decided to make myself a set of tactile flashcards. A teacher friend suggested cutting letter shapes out of sandpaper, but I wanted something more visually stimulating to complement the touchy-feely aspect. Above you can see a few of the cards I’ve made. In actual fact my class has mostly used them visually, but occasionally I ask them to close their eyes and feel the shape of the letters with their fingers, just to involve another sensory pathway as they learn.
They are a little time consuming to make, but it’s a resource I can keep using for a long time so I think it has been worth the effort!
First I purchased a packet of pastel A5 card and laminated them, to make them more durable.
Next I made paper templates of the letters using the font Gisha at size 600pt. I chose Gisha because of its simplicity – I thought it would be too difficult cutting thick material like corrugated cardboard if I used a more ornate font. Also I figure it’s good for the kids to learn to recognise letters in a variety of fonts.
Lastly I used a selection of tactile materials to make the final product, which I attached using double sided adhesive tape.
Felt comes in many colours, is easy to cut and doesn’t fray.

Ribbon is pretty, and this velvet ribbon feels amazing – but it’s not so easy to make it curve neatly, and you need to take care of the ends so they don’t fray. (I folded mine under.)

Textured paper is easy to cut but quite delicate, and not as rewardingly tactile as some materials.

Corrugated cardboard, on the other hand, feels fabulous but can be a bit of pain to cut.

Thin foam sheets are easy to cut out and work with, and give a good raised edge even if they are fairly bland to touch.

Glitterboard looks fabulous, feels good and is moderately easy to work with, but will shed some glitter. It is also a great way to blunt cutting machine blades (not that I used a cutting machine for these cards.)

I’m not sure what this sort of material is called – I had a small piece I salvaged from around a boxed floral arrangement. It looks great and is certainly quite different from the other materials, but the kids cannot help themselves and are constantly pulling it apart! I wouldn’t use it again for that reason alone.

Here I used a smooth paper but edged it (alas, not especially neatly) with a thin line of glitter glue, which dries to a lovely hard ridge and gives a 3-D feel quite different to just the paper by itself.

The kids learn “Bet has a belly button” and my Bet card has a button too.

They also learn to distinguish Chaf from Kaf with “Kaf catches” (hard k sound) so my Kaf caught a ball.

For me, the joy of making my own cards is ending up with an useful resource that I like the look of (and feel of) and feel inspired to use!!
The Rosh Hashanah skirt
Posted on: 16 September, 2014
- In: Craft for mums | Festivals
- 1 Comment

Last year I decorated a t-shirt for my daughter for Rosh Hashanah. She was very happy with it, but it didn’t match anything she already owned. So I promised her that this year I would make her a matching skirt.
Let’s just say that the last 12 months has gone really fast! Rosh Hashanah was looming on the horizon and I still hadn’t gone shopping for a skirt pattern. So I took advantage of the fact that (a) my daughter is young enough to appreciate anything I sew for her (b) I have a stash of groovy fabric (as seen in my Rosh Hashanah challah cover) and (c) the internet is full of useful sewing blogs explaining how even people like me – with very limited sewing skills – can still easily rustle up a fun skirt.

It’s loud, it’s proud, and my daughter loves it. Maybe next year I should make my husband a matching kippah?

Card made by T (aged 7)

Cards made by Mum
Looking for a fun and easy Rosh Hashanah card craft? This is a variation on an activity I saw on the Challah Crumbs website. Basically it involves printing apples using the usefully circular nature of the end of a cork. This may be easier said than done if you don’t drink wine – or even if you do, given how much less common wine bottles with corks are these days. It might be time to pop that bottle of champagne you’ve been saving for the right occasion. 🙂
Fortunately for me, I saved a bunch of corks some years ago with the plan of making an entire pinboard out of recycled corks. The pinboard never eventuated, but the corks were still hanging around. (Yes, I am that sort of person who finds it hard to throw things away, how did you guess?)
Rather than keeping the corks completely round, I used a cutting blade to take out two small chunks to mimic the dimples at the top and base of an apple. The stems are just added in pen afterwards.

Not that you can see it clearly, but I’ve carved two dimples into each “apple”.
Corks are not uniformly flat, especially once you’ve impaled them with a corkscrew, but this adds to their charm in my opinion. I initially tested my cork stamps with ink pads, and I really liked the result. The handwritten Hebrew letters are less of a feature, but I was making this in a rush as a demonstration model for a class of children who were not going to be critical (thankfully!) I gave them some Hebrew alef-bet stencils and they enjoyed finding the right letters for their own cards.

We don’t have colourful inkpads at cheder, so there we used paint. It worked fine, but if you are doing this activity with kids then I recommend you have a scrap sheet of paper or cardboard where kids can stamp first to lose some excess paint prior to stamping their Rosh Hashanah card. This is because if you have too much paint on the end of your cork, you end up with a blob which looks less like an apple and more like somebody stepped on a paint bug and squished it to the page.

The advantage of paint is that you can end up with mixed colours which look fabulous, as my daughter demonstrates above.

Rosh Hashanah is in less than two weeks, so I foresee more cork stamping at home this weekend!
Update: I made cards for family on the other side of the country using ink, with a stamped greeting in the middle. I was pretty happy with how they turned out. It’s not so obvious from this photo, but the metallic gold apples looked great.

Yom Kippur quiz for kids
Posted on: 8 September, 2014
- In: Festivals
- 2 Comments

I was teaching a group of children aged 6-9 about Yom Kippur facts and customs recently, and I decided to do it in the form of a group quiz. I printed out my questions and laminated them, then my class took turns pulling a question out of a bag and reading it aloud. That was good because even the ones who were reluctant to venture an answer still contributed to the activity. Nearly half the questions are “True or False?” which the kids seemed to enjoy. My 7 year-old daughters says this is because you have a 50% chance of getting it right! I was not fussed if they already knew the answer or not, I wanted them to think about it and then I helped fill in the gaps in their knowledge.
You are welcome to use these questions yourself. This link should open up a .pdf file: Yom Kippur Quiz
Some questions ask for basic knowledge: “What is the traditional colour to wear on Yom Kippur?” Some test understanding of vocabulary: “True or false? Yom Kippur is called a fast day because it goes really fast.” Other questions are more subtle: “True or false? Yom Kippur is a day for asking other people to forgive us.”
And there are a bunch of other questions as well, involving goats, shoes, chickens, eating, and the festivals on either side of Yom Kippur, among other things. As much fun as you are likely to have learning about this very serious festival!
Be warned: I am not providing the answers! You may need to do a little revision. 🙂 It also allows for some variations on answers to suit your own practices. Plus you may find the kids come up with more than you expect. In response to a question about goats, I had only planned to talk about scapegoats, but a boy in my class immediately pointed out the obvious connection between goats and the shofar.
May we all be inscribed for a year of learning!

