Posts Tagged ‘sewing’
The Rosh Hashanah skirt
Posted on: 16 September, 2014
- In: Craft for mums | Festivals
- 1 Comment
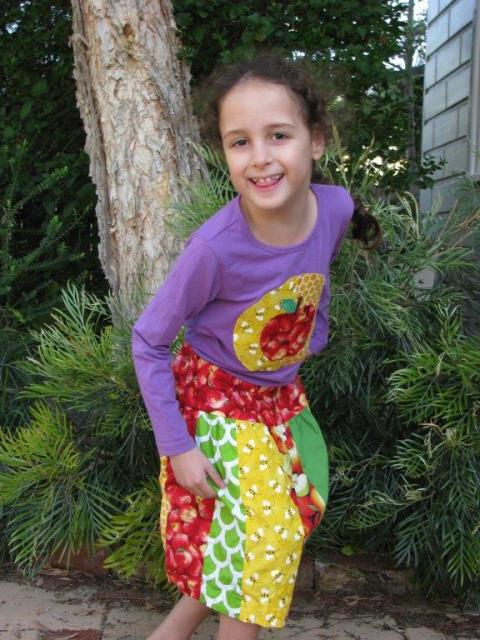
Last year I decorated a t-shirt for my daughter for Rosh Hashanah. She was very happy with it, but it didn’t match anything she already owned. So I promised her that this year I would make her a matching skirt.
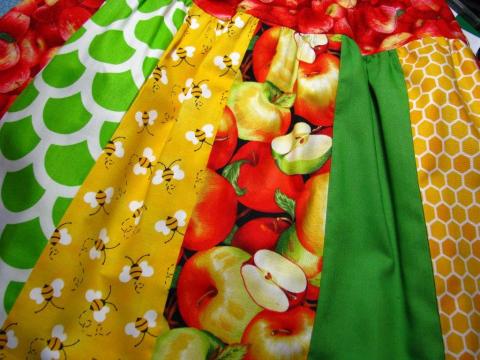
Let’s just say that the last 12 months has gone really fast! Rosh Hashanah was looming on the horizon and I still hadn’t gone shopping for a skirt pattern. So I took advantage of the fact that (a) my daughter is young enough to appreciate anything I sew for her (b) I have a stash of groovy fabric (as seen in my Rosh Hashanah challah cover) and (c) the internet is full of useful sewing blogs explaining how even people like me – with very limited sewing skills – can still easily rustle up a fun skirt.
It’s loud, it’s proud, and my daughter loves it. Maybe next year I should make my husband a matching kippah?
After seeing the fabrics I purchased to make my Rosh Hashanah challah cover, my daughter asked for a Rosh Hashanah t-shirt. This design was very quick and easy to make.
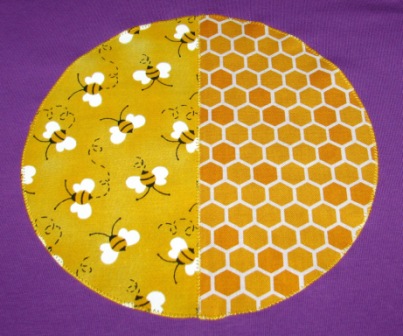
Step 1: Cut a circle or two semi circles of honey-ish fabric using double sided iron-on adhesive. (Anyone can be good at applique with this stuff – it’s fantastic!) I just drew around a plate to make my circle. Iron on to a plain t-shirt, and zig-zag stitch around the edge(s).
In case you’re wondering, purple has no connection to Rosh Hashanah as far as I am aware, it just happened that we had a plain purple t-shirt in the house and that saved me a trip to the shops. 🙂
Step 2: Find a picture of an apple on the internet (or draw your own) and use that to apply a fabric apple in a similar fashion.
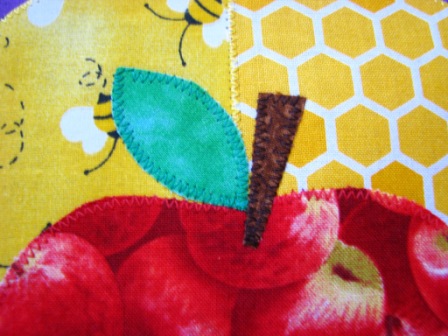
Step 3: add a stem and leaf in the same way.
That is all there is to it! It’s a really fast project (assuming you have a stash of suitable fabric and some iron-on adhesive!)
End result? One very happy daughter, who has subsequently worn her new t-shirt at every available opportunity!
If you like this, you might also like to see the t-shirt I made her for Pesach.
Rosh Hashanah challah cover
Posted on: 30 August, 2013
New Year is just around the corner, and I have been very busy in the lead up this year!
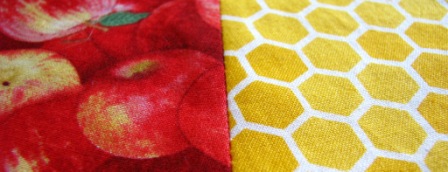
Following on from my earlier Chanukah and family handprint challah covers, I have now made one for Rosh Hashanah. (I think I’ll be taking a break from challah covers for a while now!) As Rosh Hashanah challah is round, so so is this cover, and the fabrics depict or represent apples and honey, two traditional sweet foods eaten for the new year.
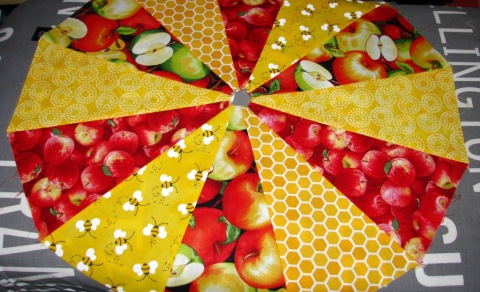
I don’t have much patchwork experience and I wanted something simple (read: foolproof) so I found a very easy looking idea on the internet: a circle made by sewing triangles together. I made a template out of cardboard, just a triangle with a 30 degree point. 12 “slices” x 30 degrees = 360 degrees aka a full circle. By cutting the point of each triangle off before sewing them together, I didn’t need to worry whether or not the points would meet up neatly.
As you can see, it is not particularly circular at the edge, but you cut it back later. (Make sure you cut your fabric larger than you think you’ll need so that it’s not too small when you trim and hem it.) Alternatively, you might be smart enough to cut the template with the right curve built in – but I was sticking with simple!
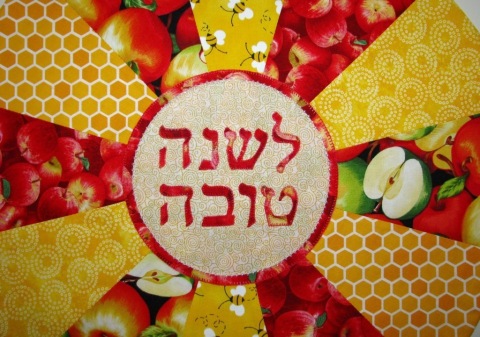
Next I appliqued a circle to go in the centre and cover that hole. I printed off the text for L’Shanah Tovah (literally “for a good year”) using a font called Frank Ruehl and traced around it to put the outline onto double sided iron-on adhesive. A fair degree of fiddly cutting out and ironing on later, it looked like this:
I used a bit more iron-on adhesive to stick the circle in the right place. Then it was just a case of stitching around the edges to make sure nothing falls off, EVER, and including a few beads for decorative effect.
Finally, I cut a circle of fabric for the back, trimmed the front to match, sewed the two faces together (you get the general idea…). Next job, relocating that really good Rosh Hashanah challah recipe I used last year.
I wish you and your loved ones L’Shanah Tovah – may you be inscribed in the book of life for a sweet and blessed year.
Family challah cover
Posted on: 12 June, 2013
- In: Craft for mums | Shabbat
- 2 Comments
Feel the urge to sew something useful and maybe a little bit fancy, but don’t think you have the stamina for a quilt? Think challah cover! Big enough to look impressive, small enough to finish in a relatively short space of time.
Our first challah cover was a wedding gift and has already given us 15 years good service, but we felt like a change. I made a new challah cover for Chanukah last year but I wanted a design which would be suitable for use year-round. Then an idea coalesced after I read a post on Sweet and Crunchy in which she made a mini-quilt featuring the outlines of her childrens’ hands.
I thought it would be lovely to capture an image of my daughter’s childsize hand next to those of her parents. Even when she grows up and leaves home, we can still have her with us on Shabbat. I was also reminded of a custom of our synagogue – when they say the blessing over the challah, everyone reaches out to touch the arm or shoulder of the person next to them, forming branching chains that reach towards the person in the centre who is holding the tray with the challah on it. If we have visitors who don’t know this custom, someone will usually call out “Everyone’s touching someone who’s touching the challah!”
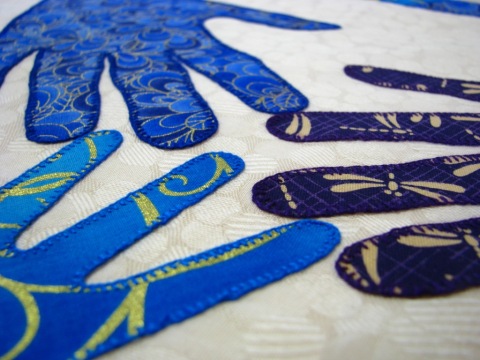
So we traced around our hands (my husband and I are right-handed, our daughter is a “lefty”) and transferred the images to fabric in our favourite colours. I blanket stitched around each hand. In retrospect it might have been better if the arms went to the edge of the cover rather than looking like disembodied glovesl but I was making the pattern up as I went, and didn’t think of that until later.
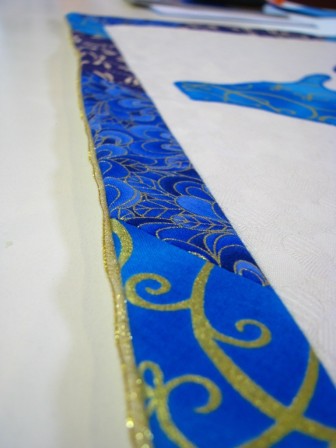
Then I made some bias binding out of the three fabrics to use as a border, and stitched a gold ribbon into the seams when I put on the backing.
And here we are: everyone’s touching the challah cover that’s touching the challah.
Appliqued T-shirts for Pesach
Posted on: 12 March, 2013
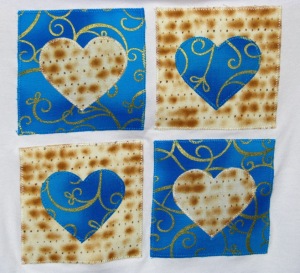
I decided to decorate a t-shirt for my daughter for Pesach. I wanted to make something easy but cute, incorporating some matzah-coloured fabric I bought online. After brainstorming a couple of designs, we agreed on this one: four hearts on four squares.
I used an image from the internet as a template for the heart. It was very simple to cut and assemble the fabric pieces onto a plain t-shirt using iron-on fabric adhesive (heat and bond lite), after which I zig-zag stitched around the edges of each shape.
We have another little girl coming to our seder this year, so I made a shirt for her too.
They are going to look so cute together!
My daughter was very excited and wanted to wear her new shirt right away. And to bed. And to school the next day. 🙂
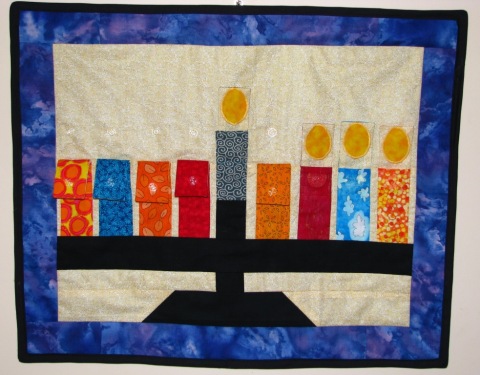
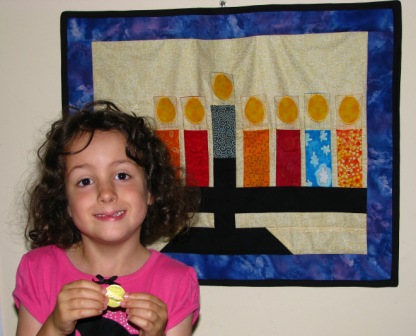
My plan: to make a wall hanging depicting a chanukah menorah (chanukiah) with flames that would fold up as you “lit” them each night, revealing a small pocket in which to find a piece of gelt (chocolate coin).
What happened first: my original design (which I thought was quite elegant) did not have candles wide enough to accommodate the chocolate coins I wanted to hide in them, and if I scaled the design up so that the candles were wide enough, the entire thing was simply way too big. So I turned that design into a challah cover.
What happened next: I ended up making a wall hanging dictated by the width of the candles and the design was a lot less glamorous, at least in part because I made it up as I went along rather than starting with a pattern. I used clear plastic press-studs to hold up the flames.
It took me a day or two to design/cut/machine sew the thing together and about 5 weeks to make myself hand sew 18 press-stud pieces. If I was making it again (which, trust me, I am not going to do) I would change quite a bit. But it does hold gelt, which makes it extremely popular with the youngest member of the household; and if she’s happy then I’m happy too.
Felt latke beanbags
Posted on: 13 December, 2012
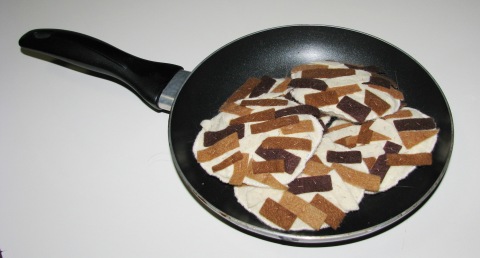
I needed some latke-shaped beanbags for a latke-tossing game (as you do) and a quick browse of the internet lead me toa fantastic tutorial on how to make a beautiful felt latke (and some other cool things).

Latkes made by Brittany, you can find them on Etsy.
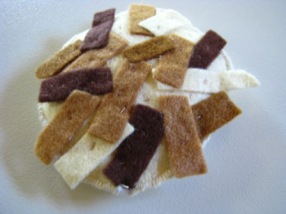
Thus inspired, I made half a dozen of my own. As you can see, my use of darker brown shades of felt give the more realistic impression that I occasionally forget to flip my latkes quickly enough and they do get a little crispier than is perhaps optimal!
I more or less followed Brittany’s tutorial, but only put the small felt pieces on one side. Apart from being a bit of a fiddle, it makes it easier to see if you’ve flipped your latke if one side is plain and the other side is fancy. I attached the small pieces of felt with iron-on double sided adhesive, then just put a few stitches through for decoration.
I made a separate fabric pocket containing some rice, and then sewed the felt pieces together either side of it. Hopefully this means that even if the felt comes apart (which is unlikely) the rice won’t be able to leak out.
Anyway, they make great beanbags for latke flipping, latke tossing, balancing latkes on your father’s head, and general flying latke mayhem. Plus they sit still long enough to be photographed, which is more than I can say about the ones I cooked for dinner this evening.
Appliqued cushions for Chanukah
Posted on: 6 December, 2012
This was a very spur-of-the-moment idea. A friend asked me to bring some cushions for kids to sit on while they listened to Chanukah stories. I was going to fetch a few out of the attic – we have a stash we keep specifically to recline on at Pesach – when I noticed a neighbour was throwing out 4 plain blue cushions. Always happy to recycle, I collected them, washed them, and decided to add some easy applique.
Actually I mentally ran through a bunch of possible decorating ideas before going with what seemed most foolproof! I printed off outline Hebrew letters in the largest font possible (999pt, in case you were wondering) to use as a template, then used heat-n-bond (something I have only recently discovered, but LOVE) to iron the resulting letters onto a square of co-ordinating fabric, and then sewed that to each cushion cover. The zig-zag stitching is not perfect, but it does the job and the whole project was done in a couple of hours.
We’ll be dedicating these cushions to the comfort of dreidel spinners’ tucheses for years to come!
Appliqued menorah challah cover
Posted on: 11 November, 2012
- In: Craft for mums | Festivals | Jewish symbols | Shabbat
- 4 Comments
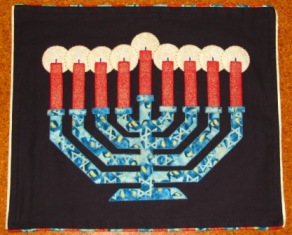
This is part one of the story of two chanukiot (chanukah menorahs). I really wanted to sew a wall hanging of a chanukiah, so I designed a lovely nine-branched menorah on graph paper and scaled it up.
As will become apparent later, this design turned out to be the wrong size for my planned wall hanging – but I still liked it. So I decided to make it into something smaller: a challah cover. Yes I know they usually have a Shabbat theme, for obvious reasons, but I have plans for a number of festival themed covers so we can change them over as we move through the year.
In my haste to get the project underway, I cut out the menorah from a lovely teal blue/gold fabric which, I discoved later that day, clashed with every other piece of fabric I had intended to cut the candles from. I was about to throw it out and start again when my husband said “that would look great with red”.
I’m not sure that anyone else has ever used red chanukah candles, but when we lived in the UK a decade ago, nowhere near a Judaica shop and well before it became easy to buy anything and everything over the internet, we used to buy candles that were perfectly sized for our chanukiah from our local Asian food shop. They were very good quality, and they were red, a symbol of good fortune in their country of origin. In the end, the whole project had quite an oriental flair to it, with the dramatic use of dark colours – a striking contrast to our existing white challah cover!
This is my first effort at a hand appliqued project. My stitching was a little variable, but I enjoyed incorporating some beads for the wicks and around the candlelight. And here is the finished product!
Now, back to the wall hanging…
Sew your own toy Torah
Posted on: 7 May, 2012

Exhibit A: not my cup of tea
I’ve been wanting a stuffed toy Torah for a while now, but they are not available locally, postage from overseas is expensive, and frankly I wanted something that looked more like a scroll and less like a multicoloured cartoon alien (see exhibit A). With Shavuot approaching, I decided to take the plunge and make my own. Thankfully at least one talented person has been smart enough to design their own toy Torah, and kind enough to put the instructions online. Thank you Sweet&Crunchy!!
Following her tutorial, I didn’t have too much trouble putting my own home-made sewn-and-stuffed toy Torah together. I used calico (approx 30cm wide x 85cm long) for the scroll, felt for the handles (approx 8.5cm diameter for the circles), a ribbon for the belt, and some leftover fancy fabric (with scalloped edge) for the cover. I only had to unpick one major blooper, so I’m feeling quite pleased with myself!
My daughter is very happy and already making plans to carry it around shul for Simchat Torah! I am hoping to make a breastplate, yad and possibly even rimonim, but the technicalities of all that will be revealed in the fullness of time (ie after I figure it out for myself!)
