Posts Tagged ‘Purim’
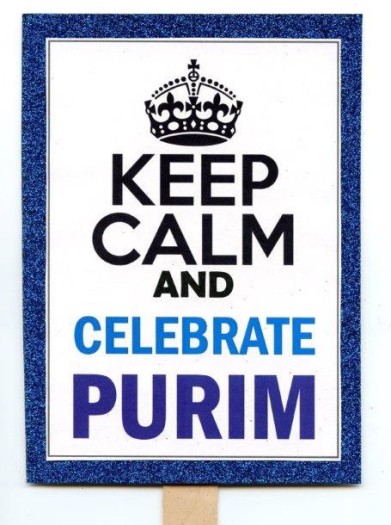
Purim photo booth
Posted on: 1 March, 2015
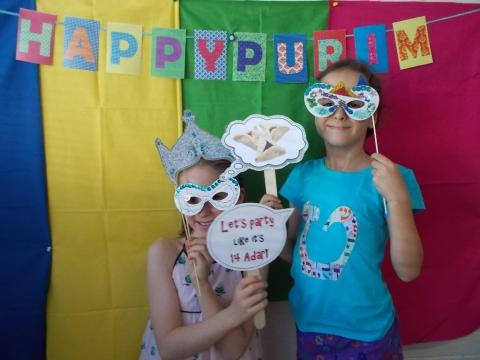
Each year on the weekend before Purim, we run an activity session which always involves mask making or decorating. The younger children love anything involving cutting, sticking, sequins, feathers and glitter, but it can be difficult to enthuse the older ones, especially the boys. This year, only a few days before the session, I had the idea of incorporating a photo booth, with a range of Purim-themed props. It was fun to create, and the booth was a hit with kids of all ages.
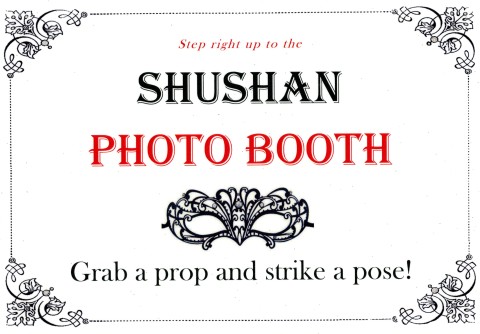
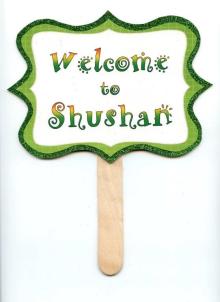
The first thing I made was my advertising sign. As the Purim story is set in the city of Shushan, I decided the good folk of that town would be sure to enjoy a chance to dress up and smile for the camera. You can download a PDF of the Purim photo booth sign here.
I googled free photo booth props and found some fabulous Victorian-era handlebar moustaches and lips that could outpout Mick Jagger, but nothing which really took my fancy, so I decided to make my own.
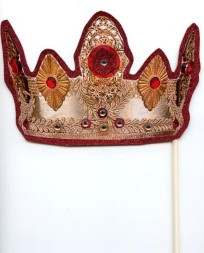
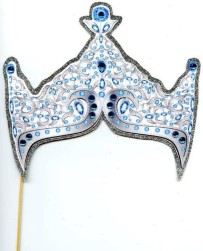
In recognition of the key roles of Queen Esther and King Achashverosh in the Purim story – a pair of gem-studded crowns. For these, I selected, resized and printed out a couple of pictures of crowns found via google image; cut them out and attached them to glitter cardstock cut a little larger than each crown; and added a couple of stick on gems. Then I sticky-taped a kebab skewer to one side of the reverse.
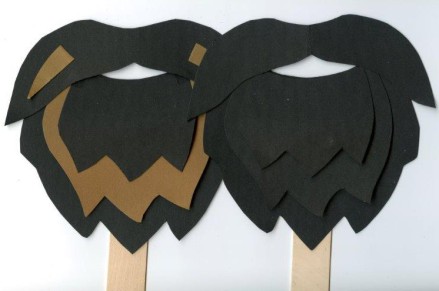
Reflecting the historical likelihood of full manly facial hair – some cardboard beards. You can make your own – biblical beard prop instructions are here.
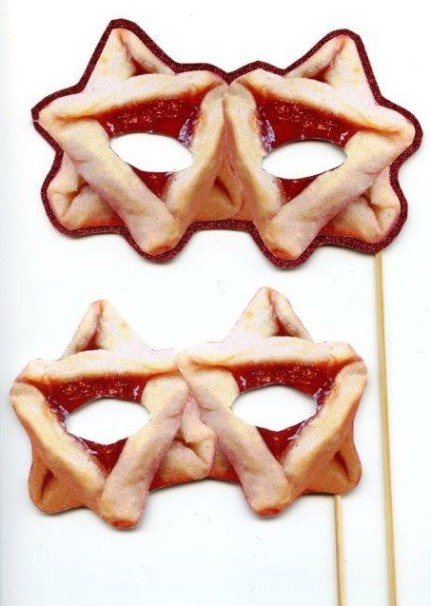
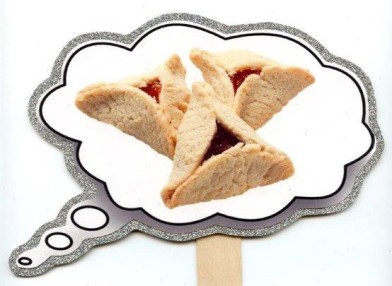
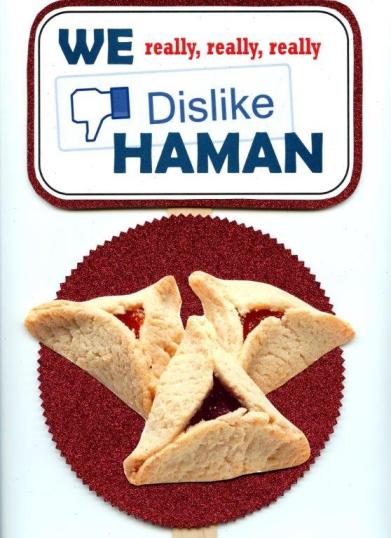
Celebrating a traditional Purim food in a non-traditional way – I may have invented hamanspectaschencles.
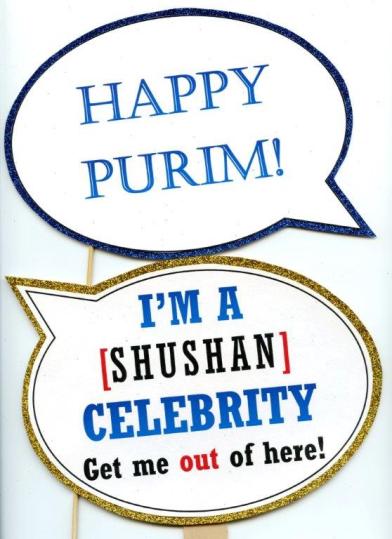
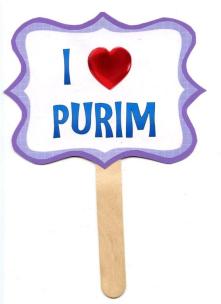
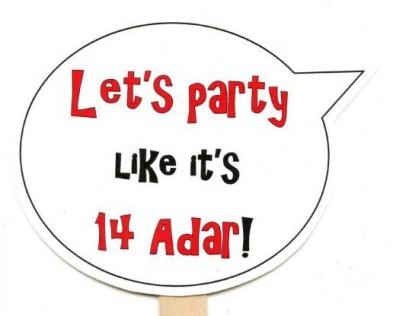
And then I just made up a bunch of different signs, thoughts and speech bubbles. It was fun. I had more ideas, but they will have to wait for another occasion.
You can print your own Purim photo booth signs here – just attach to cardboard and add a handle. I mostly used large plain popsticks from a craft store – they are the size of tongue depressors.
I pinned up some plain colourful fabric as a backdrop, ran an easy printable Purim banner across the top, and after the kids had made their own mask (or beard, or hamanspectashencles), I took their photos. It was loads of fun, and I’ll definitely be doing it again next year.
Printable Purim banner
Posted on: 28 February, 2015
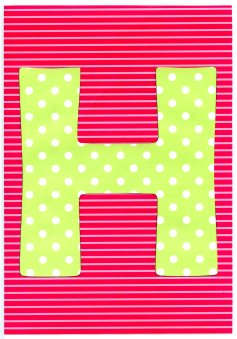
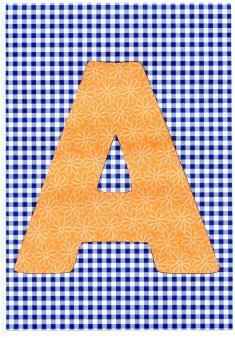
After I constructed my paper Purim banner, I scanned the letters so I could print them out again without having to worry about any cutting and sticking. You can find the individual letters saved as .jpg files on the original post.
I saved all the letters at their original size into a PDF file – but the file was huge! I compressed the file, but this reduced the print quality. It is probably OK if you want something large (to be seen across the room) but are not too worried about how it looks up close. Purim banner – A4 size.compressed.
Next I saved them into a PDF file with each letter half as big: Purim banner – A5 size This file has a better resolution and should print fine.
I also ended up, somewhat by accident, with a PDF file which gives two copies of each letter, but with four letters per page. These are the perfect size for a couple of small banners for home or classroom – download it here: Purim banner – mini size
Print, cut out the rectangles, and sticky tape a piece of ribbon across the back. Try and leave slightly more space between the words than I managed on my first effort!
Happy Purim!
- In: Craft for mums | Festivals
- 1 Comment
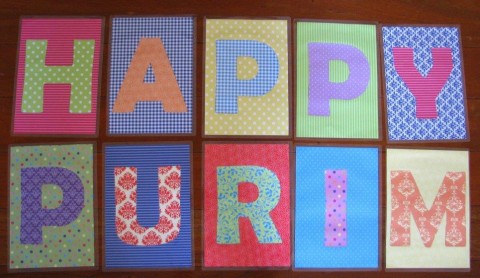
Purim is fast approaching, and I wanted to put something colourful on the pinboard in the hall we use for Hebrew school. The easiest thing I could think of was a banner – or (time was running short) a bunch of letters arranged like a banner. Or indeed just a bunch of letters pinned to the board. [NB: the picture above is a not so great photo of the finished letters on the floor of my home. They look much better on the pinboard!)
Of course these letters needed to convey the joyful, party mood of Purim, so I decided to make them out of scrapbooking paper in a variety of colours and patterns.
These are simple to make if you have access to a printer. Make a template for the letters in Publisher or Word (or other text based software) by inserting a text box onto a blank page so that it fills almost the entire page. (It’s easier in Publisher, but if using Word, you will probably need to specify narrow margins in the Page Layout tab). Set the font to something which is going to be easy enough to cut out when very large. I used a font called Berlin Sans FB Demi, size 750pt. Into this box, type one letter. Use the formatting tools to set Font fill to “no fill” but keep Font outline as black (or any other colour).
Now you can print out this letter onto coloured paper. I like to buy packs of fancy scrapbooking paper when they are on special. I don’t actually scrapbook, I use the paper for papercuts, card making etc. The paper tends to be square (unlike your printer), but it’s not difficult to fold each piece and cut it to fit your printer tray, or trace around a piece of cardboard the size you need (A4 in my case). It doesn’t matter if the edges of these pieces are not perfect, because you will be cutting out the printed letter in the centre of the page.
Once you have the letters you need, attach each of them to a contrasting backing sheet. The letters I made would have looked fantastic on 12 inch square backing sheets, but I cut mine down to slightly smaller than A4 because I wanted to laminate them, and I only have A4 laminating pouches.
Well that looks great, I hear you say, but I don’t have time to faff around making a template and cutting up bits of coloured paper. No problem! After I made my letters, I scanned them. You can download individual letters from this page, or PDF files from here – (almost) no cutting or sticking involved.
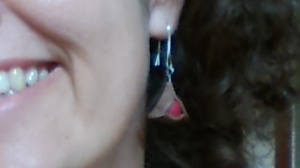
Recently I used modelling clay to make mini hamantaschen for I Spy Graggers. It was fun, and I wondered what else I could make. (I am inspired by Joanna at Bible Belt Balabusta. Check out her tiny hamantaschen as playfood for toys, and her model magic hamantaschen fridge magnets.) At some point it occurred to me that I’d love to own some hamantaschen earrings. I’ve never made earrings before – but then again I’d never used modelling clay before this month either, so I decided to give it a go.
I’m sure you can get “proper” earring components and jewellery making tools which could make your earrings look very professional, but all I had at home was a spool of beading wire, which is extremely soft and easy to bend by hand. This turned out to be all I needed. When I made my hamantaschen out of modelling clay, I bent one end of a length of wire into a loop, and placed this loop between the “dough” layer and the “filling”. The wire was then trapped in place when I baked the clay.
Then, I twisted the end of the wire which was sticking out into a small loop. I could have used the hamantaschen as pendants at this point, but continued on with the earrings by threading a second length of wire through the loop and fashioning it into a hook to go through my ear. As I said, beading wire is really easy to bend!
And now I own a own a cool pair of hamantaschen earrings, just in time for Purim! Yay!
Purim is just around the corner, and I wanted a gragger project with a difference. May I present (drumroll please!) the “I Spy” gragger!
This craft activity combines two great ideas – 1. something to make noise when Haman’s name is mentioned during the reading of Megillat Esther at Purim, and 2. the I Spy bag (or in this case bottle). If you’ve never seen an I Spy bag, they are great: a collection of random (or not so random) small interesting objects hiding in a sea of small pellets, awaiting your discovery. I bought one for my daughter when she was younger, and I think I enjoyed finding the items in it even more than she did!
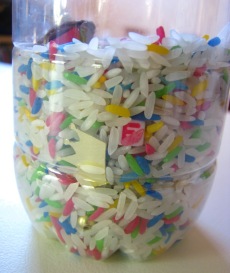
The gragger part is easy – an empty plastic bottle containing some rice. You could also use uncooked pasta, dried lentils etc, but rice is relatively quiet when shaken, plus you can easily dye it lovely colours by putting rice, a squirt of food colouring and a teaspoon of white vinegar into a ziplock bag and shaking/rubbing until the rice is evenly coloured. My daughter enjoyed helping with that! I used a cup of rice per 600ml bottle but go with what looks good to you.
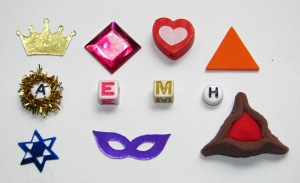
Deciding what items to include for the “I Spy” component can be fun too. I thought of a few myself, then called on the lovely Joanna B from Bible Belt Balabusta for some more inspiration. Here’s our combined list of potential items for inclusion:
– Alphabet beads for the inital letters of the names of the main characters. (I threaded a piece of gold pipecleaner through the A for King Ahashverosh.)
– a plastic jewel for Queen Ester
– a gold coin, or a gold or silver crown (to be cut out of shiny cardboard or trimmed from a piece of foil lasagne pan) for King Ahashverosh
– a heart to represent the good Mordechai
– a triangle for Haman’s hat
– mini Hamantaschen made from modelling clay
– a tiny horse, to represent the one that Haman had to lead Mordechai around on
– Ahashverosh’s sceptre, which he extends to Esther when she visits uninvited, maybe made from a shortened, painted toothpick with a bead glued on the end
– food for the banquet
– a tiny book or scroll that King Ahashverosh checks when he can’t sleep, finds Mordecai’s deed within.
– dice: to represent the “lots” (“Purim”) that Haman threw to select the date to destroy the Jews
– mini masks (cut from cardboard or perhaps found as confetti)
– magen david confetti
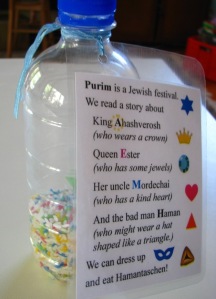 I used the items I could get hold of (or make) most easily, but it would have been fun to use all these ideas. (Thank you Joanna!) The children I was making the graggers with are quite young – 2-3 years old, so I made a list of the items and laminated it so it could be tied to the neck of the bottle as a reminder of who is in the story and what could be found if you looked.
The kids loved putting things into the bottle and shaking it all up. We then had a great rendition of my Purim story for young children (ie the G-rated version) with accompanying Purim spoon puppets, and tested out some new hamantaschen recipes. And now we’re all set for Purim!
I am convinced there are more ways to spell gregger/grogger/gragger than there are ways to spell Hanukkah/Chanukah! But it doesn’t matter how you spell it or what it looks like, as long as it makes enough noise to drown out the name of Haman, right?
This is a cheap yet durable Purim noisemaker which is easy to make using a variety of things you can find at home.
You will need:
1. An empty plastic bottle (with lid). Small ones are easiest to hold and shake. This year we used ice tea bottles.
2. Things to put in that will make a noise. Anything goes – rice, dry lentils, uncooked pasta, buttons, craft bells… the list is endless. You don’t need very much – if you look at the picture above, the amount of “rattly stuff” does not even reach the bottom of the decorative label. Rice by itself makes a soft noise which is quite pleasant, but add anything else and it sounds quite cacophonic when shaken energetically (which is the only way most 4 year olds know how to shake!) To make it fun to look at, I dyed some rice with food colouring.

(Tip from someone who has been there: don’t knock over a bottle of food colouring unless you really want to do a lot of cleaning up.) Two or three drops in a small zip-lock bag of rice is plenty. If colouring pasta it helps to add a little white vinegar and to let the finished product dry on a tray, but rice will just soak up the excess moisture along with the colour.
3. Strong tape to hold the lid on the finished noisemaker (not shown on photo above), unless you want to be sweeping the contents off your floor or extracting them from the mouth of some curious toddler.
4. (Optional) Materials to decorate the outside of your noisemaker. In past years we’ve tied curling ribbon streamers around the neck of our plastic bottle. This year the kids decorated a strip of cardboard (preprinted with Happy Purim) and sticky-taped it to the outside of the bottle.
Then we read out our child-friendly version of the Megillat Ester, added some visuals with our Purim spoon puppets, and shook those greggers/graggers/groggers for all they were worth! It was great fun!
- In: Festivals | Home made games | Jewish symbols | Shabbat
- 1 Comment
This past week, I designed a little Jewish card game/board game for my daughter (aged 4). In it, you need to match 3 pictures to each of a selection of Jewish holidays.
For example, Shabbat is represented by candles, a kiddush cup and challah; Chanukah has a menorah, dreidel and latkes; Pesach has a seder plate, the plagues and matzah; and Yom Ha’atzmaut has an Israeli flag, a map of Israel and some Israeli dancers.
I found this game to be a fun way to review a lot of the festivals, identify some key symbols and talk about what we do, what we eat and so forth. Please feel free to use it yourself. The instructions are included on the pdf. I suggested putting the pieces into boxes or bags during the game, but I’ve thought of another way to do it (especially for older children) – put all the pieces face down in the middle, and turn over two at a time as you would if playing Memory. If either matches your card, move them to your card. If not, turn face down again and let the next person take their turn.
Last year our Shabbat Tot group made greggers for Purim. This year I was torn between doing a mask or a collage – so in the end I combined the two! The decorated mask is displayed by hooking it over a tongue cut into the cardboard.
Here’s the mask. It’s just a simple coloured cardboard shape with a bit of elastic, purchased from the party supplies section of our supermarket, and decorated with coloured feathers and stickers. (You can use whatever craft materials you have to hand).
And here is the background – I printed the words “Happy Purim” onto white card, then printed various Purim-themed clip art onto regular paper. (If you don’t have time to put these together yourself, please feel free to use mine: Purim mask background.) Cut the clip art out yourself or let the kids loose with the scissors and glue. I also put feathers and stickers onto my picture, because my inner child loves coloured feathers – maybe I was a party chicken in a previous lifetime? 😉 Leave space in the middle for the mask, and cut a small hill/bell curve shape with a craft knife to act as a sort of paper nose for the mask to sit on.
Here’s my daughter’s version:
She hasn’t quite mastered the art of wearing a mask and still being able to see where she’s going, but never mind! No prizes for guessing her favourite colour is green.
Happy Purim!!
Purim puppets from wooden spoons
Posted on: 10 March, 2011
Last year I made Purim puppets which were paper pictures of the main characters stuck onto popsticks. Last week I was walking through my supermarket, not even thinking about Purim, when I saw they were selling 6-piece bamboo spoon sets for three dollars. Instantly the idea was hatched, and with a little help from my daughter, we now have some hilariously kitsch Purim spoon puppets to help illustrate our reading of the “Shabbat Tot Megillah” this year.
This was so easy – all you need is
– some wooden spoons
– a pen or pencil to draw facial features (I suggest something non-toxic if you ever want to use the spoon again for its original purpose)
– some googly eyes
– cardboard for hats and crowns (we decorated ours with stickers)
– curling ribbon, wool or similar for hair
– scraps of paper, ribbon or fabric for clothing, attached in this case with pieces of pipe cleaner or more ribbon
plus sticky tape/glue/double sided tape for attaching hair/moustaches/beards.
Here are our heroes (and villain) in more detail.
The curling ribbon hair is fabulous – bounce your spoon along and the hair sproings high and low. Sadly there was a minor mishap when my daughter “danced” Queen Esther just a little too vigorously and one of her eyeballs fell off, but we found it a day later and all is well again!
The Purim Story for Small Children
Posted on: 8 March, 2011
- In: Festivals
- 25 Comments
If you’ve taken the time to read the whole megillah, the Purim story of Esther is neither a simple nor a pleasant tale. Last year I sat down to summarise it so I could read it to a group of 3-year olds, and realised it was way too long and complicated, not to mention violent, and needed serious editing. Even my summary was quite long, although I tried to make it easier to understand the main concepts and characters by omitting some of the plot complications. Also I decided that small children really don’t need to know that people occasionally want to kill us.
However even that wasn’t really enough. A year later, my daughter (now nearly four) still burst into tears in the middle of my summarised Megillat Esther when I started reading it to her today. So it was back to the editing desk, and I am now proud to present the even more abridged, even more expurgated version of the story, for the enjoyment (hopefully!) of small and slightly sensitive children everywhere. And I made up the last line, but it does segue neatly into a snack break at the end of your megillah reading!
The Shabbat Tot Megillat Esther
(The even more abridged and expurgated version)
Once upon a time in a town called Shushan, there lived a man called Mordechai. He was a very good man, and always tried to help people and do the right thing. Mordechai lived with his niece Esther, and they were Jewish, just like you. (That means they liked eating challah and lighting Hanukkah candles and singing Shabbat songs, just like you!)
In the same town there was a king called King Ahashverosh. He lived in a big palace and had lots of money, but he was a bit lonely. He needed a new queen to come and live with him in the palace. He looked everywhere and eventually he decided that the one person he liked most of all was Esther, who was not only pretty but also kind and very smart.
So Esther said goodbye to her Uncle Mordechai and went to live in the palace with the King and become his queen, but she didn’t tell him she was Jewish.
Now there was a man who worked in the palace who was not very nice. His name was Haman. He expected everyone to do exactly what he said, and to bow down to him when they saw him, and he got angry if someone didn’t do exactly what he wanted.
One day Haman met Mordechai, and Mordechai did not bow down to him. Haman became very cross and he went to the King and said, “There are some people around here who do things differently from other people, and I think you should make them go away.”
The King didn’t really know what Haman was talking about, but he said “OK, you can tell those people to go away, the ones who do things differently”.
What Haman wanted to do was to get rid of Mordechai and Esther and all their Jewish friends!
The Jewish people were very sad, because they liked living in the kingdom and they didn’t want to go away. What could they do?? Mordechai sent a message to Esther at the palace, and the message said “Esther we need your help! That nasty Haman wants to get rid of us all! Please talk to the King and ask him to stop Haman.”
Queen Esther thought “I must be very brave” and she made a special dinner for the King, with all his favourite foods. Then she invited the King and Haman to come and have dinner with her. The King thought dinner was delicious, and he was so happy that after he finished eating, he said to Queen Esther “What can I do for you, to say thank you?”
Queen Esther said “Oh please, I need you to help me and my uncle Mordechai and all our friends, because someone wants to make us go away”.
“That is terrible!” said the King, because he really liked Esther and he didn’t want her to go away. “Who wants to get rid of you and your family and friends?”
Esther pointed at Haman and said “It’s him! Haman wants to get rid of us!”
“Oh no!” said the King, and he was very angry indeed. He called his guards and said “Take away Haman and get rid of him instead!”
Then the king asked Mordechai to come and work at the palace and do Haman’s job – but of course Mordechai was much nicer than Haman! And nobody had to go and live anywhere else if they didn’t want to.
So after that, everyone lived happily in the Kingdom. Mordechai did a really good job working for the king, and Queen Esther made delicious biscuits called Hamantaschen.
The End
You can make this into a “real” megillah by formatting the text in columns and then printing it onto paper in the landscape (not portrait) setting and wrapping it around a cardboard roll. Then just unfurl it with a flourish and resist the temptation to say “Hear ye, hear ye” before reading your Purim story.
